Connectors
A connector links a service you already use, like Stripe, Supabase or GitHub, to WebTwizz. You connect an account once and it's saved to your connectors. From then on, any of your projects can use it, and a project only gets the connectors you pick for it.
When a project uses a connector, three things happen:
- The service's keys go into the project's environment variables, so your site's code can use them.
- The builder shows the service's own data for that project: revenue, errors, visitors, commits.
- The AI can read the service while it works, and set it up for you.
Where connectors live
Your connectors, in the dashboard
Click Connectors in the dashboard sidebar, under Library. This page holds every account you've connected, across all your projects.

- Connected lists the services you have an account for and the projects using each one. Manage opens the connector's page.
- Add a connector lists everything else, each with Connect.
- Search, or narrow the list with Connected, All or a category on the left.
- Need a service that isn't here? Click Request a connector.
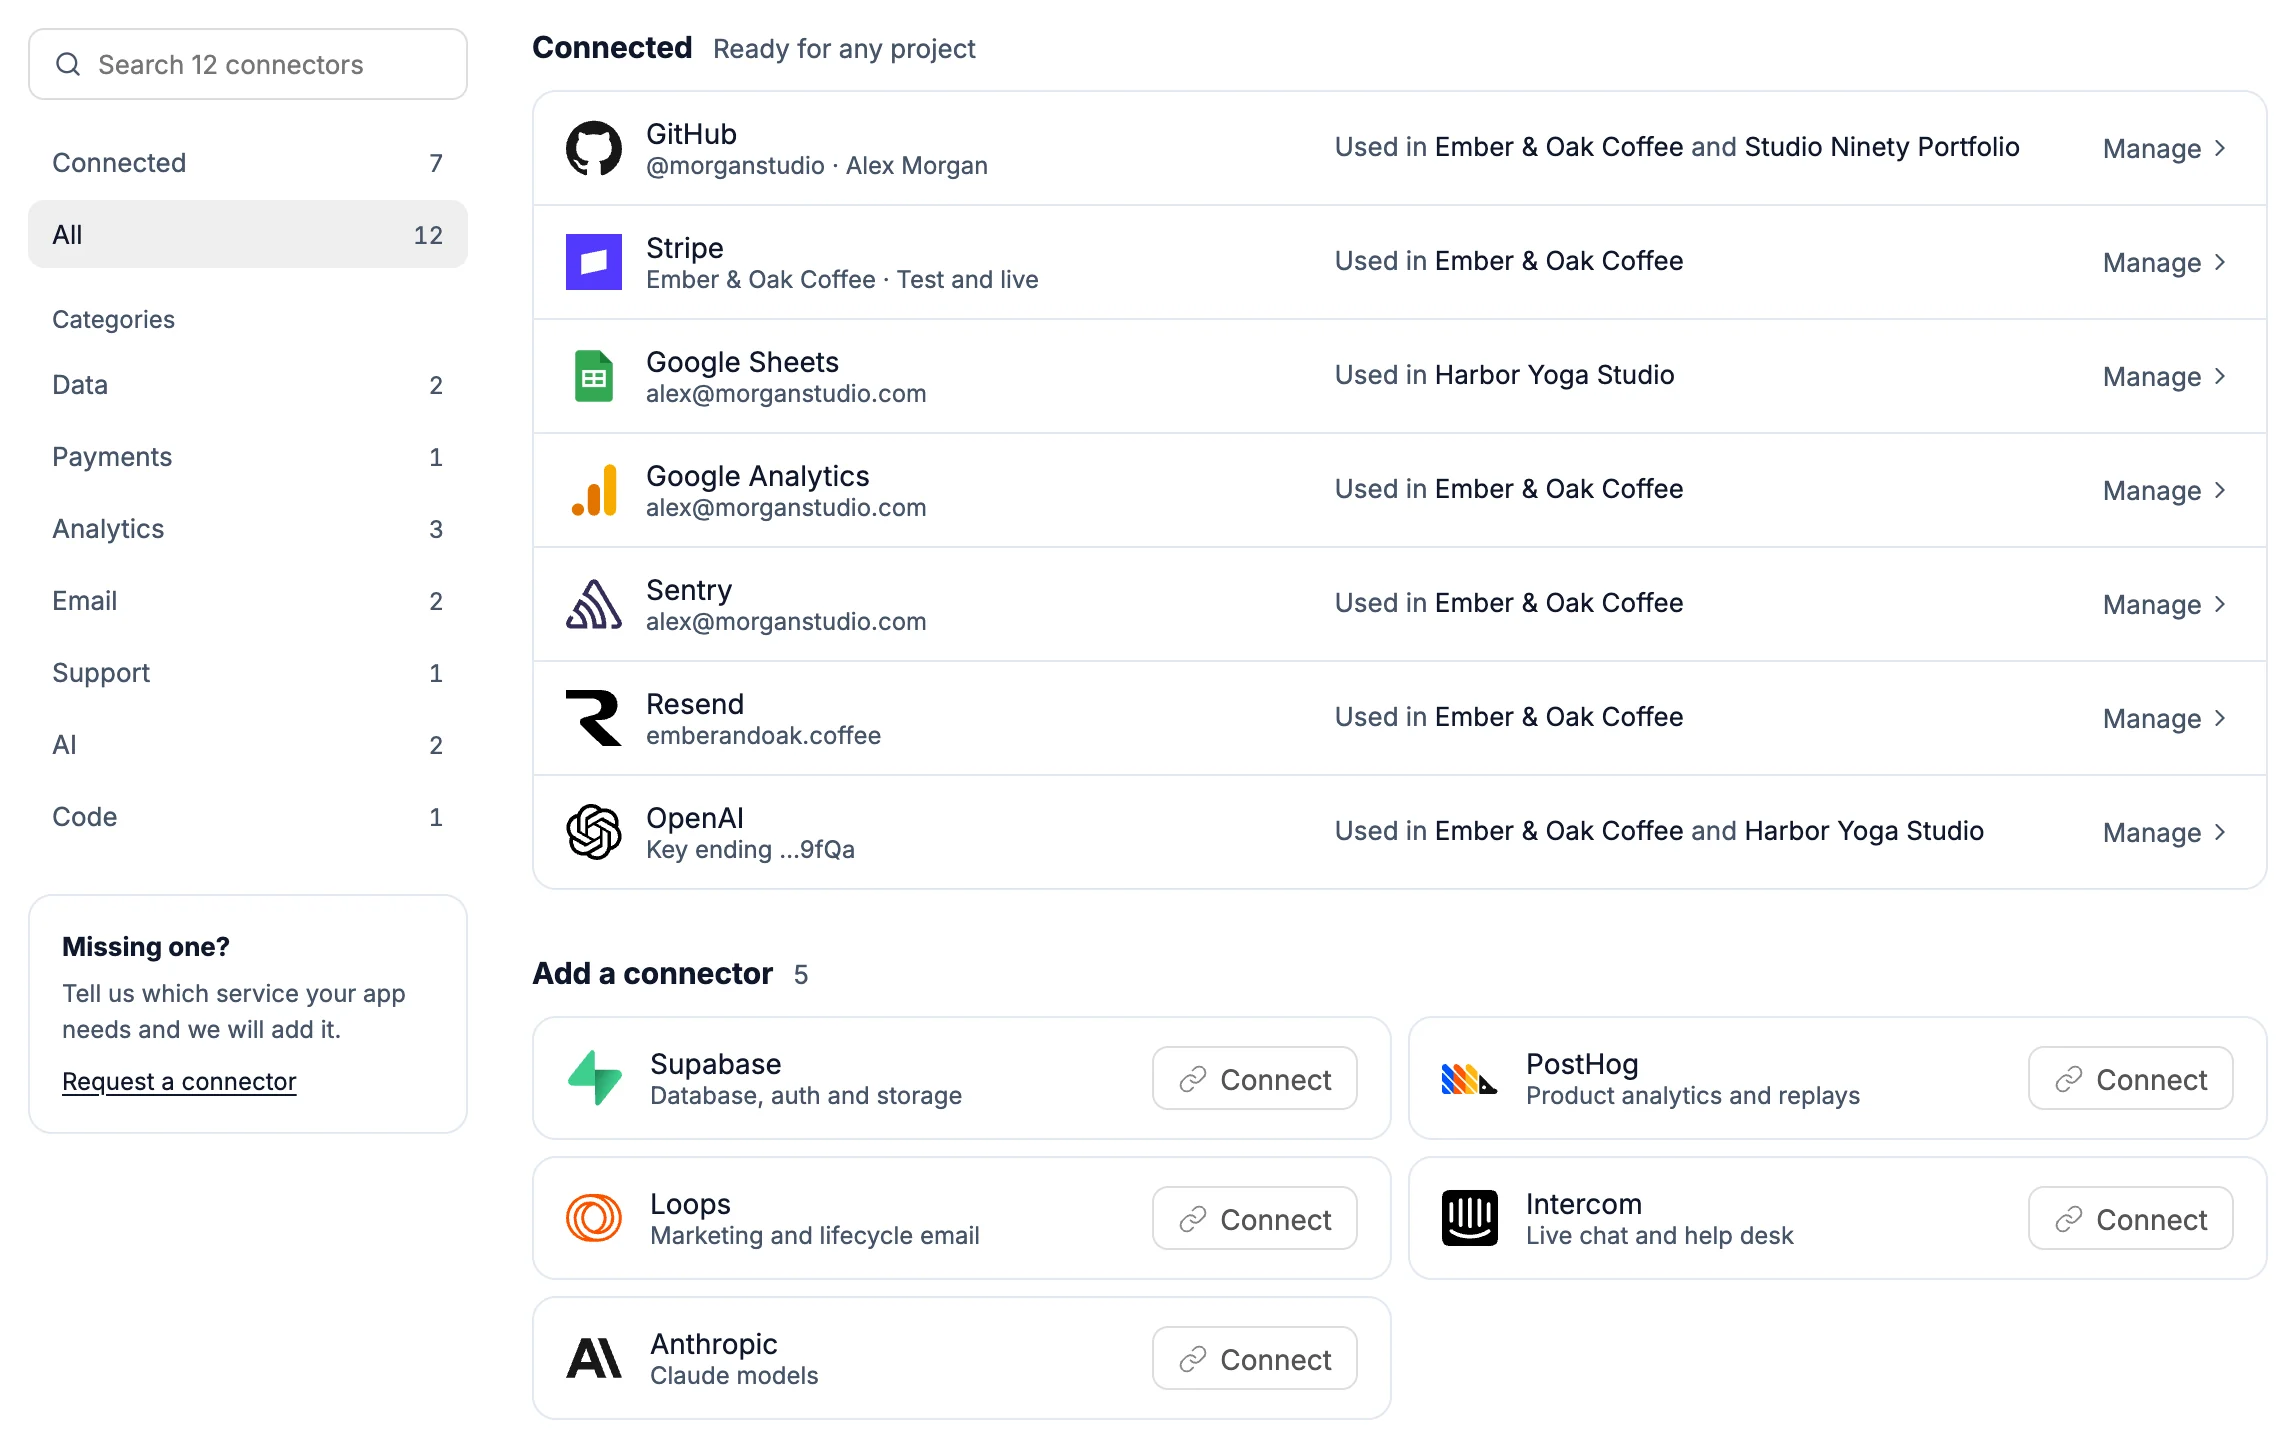
You can also find a connector by name from Search (⌘K / Ctrl+K) in the dashboard.
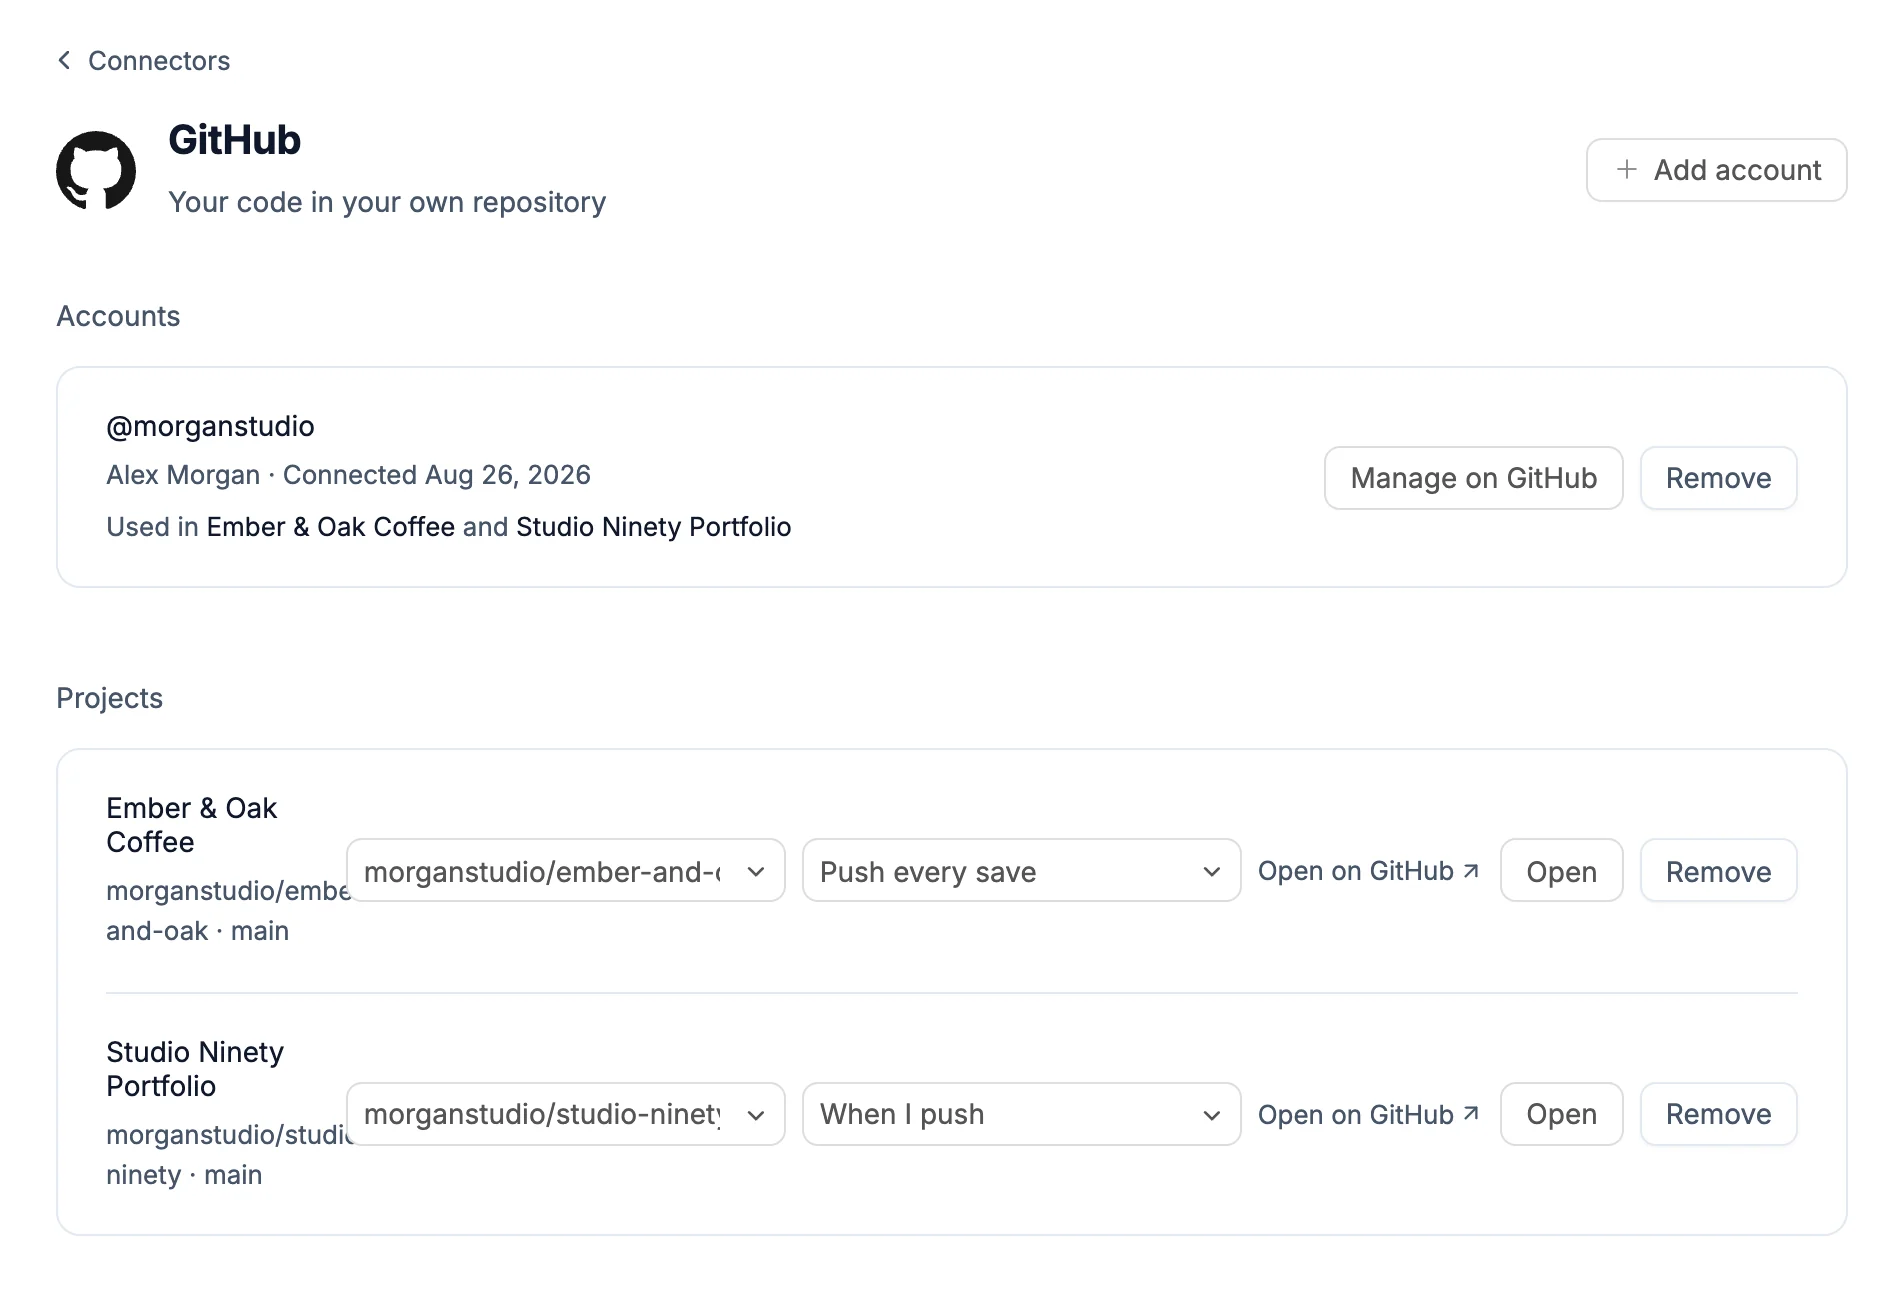
A connector's page lists your Accounts for it and the Projects using each one, with that project's settings in place. Open jumps into the project, and Remove takes the connector out of that project.
What a project uses, in Settings
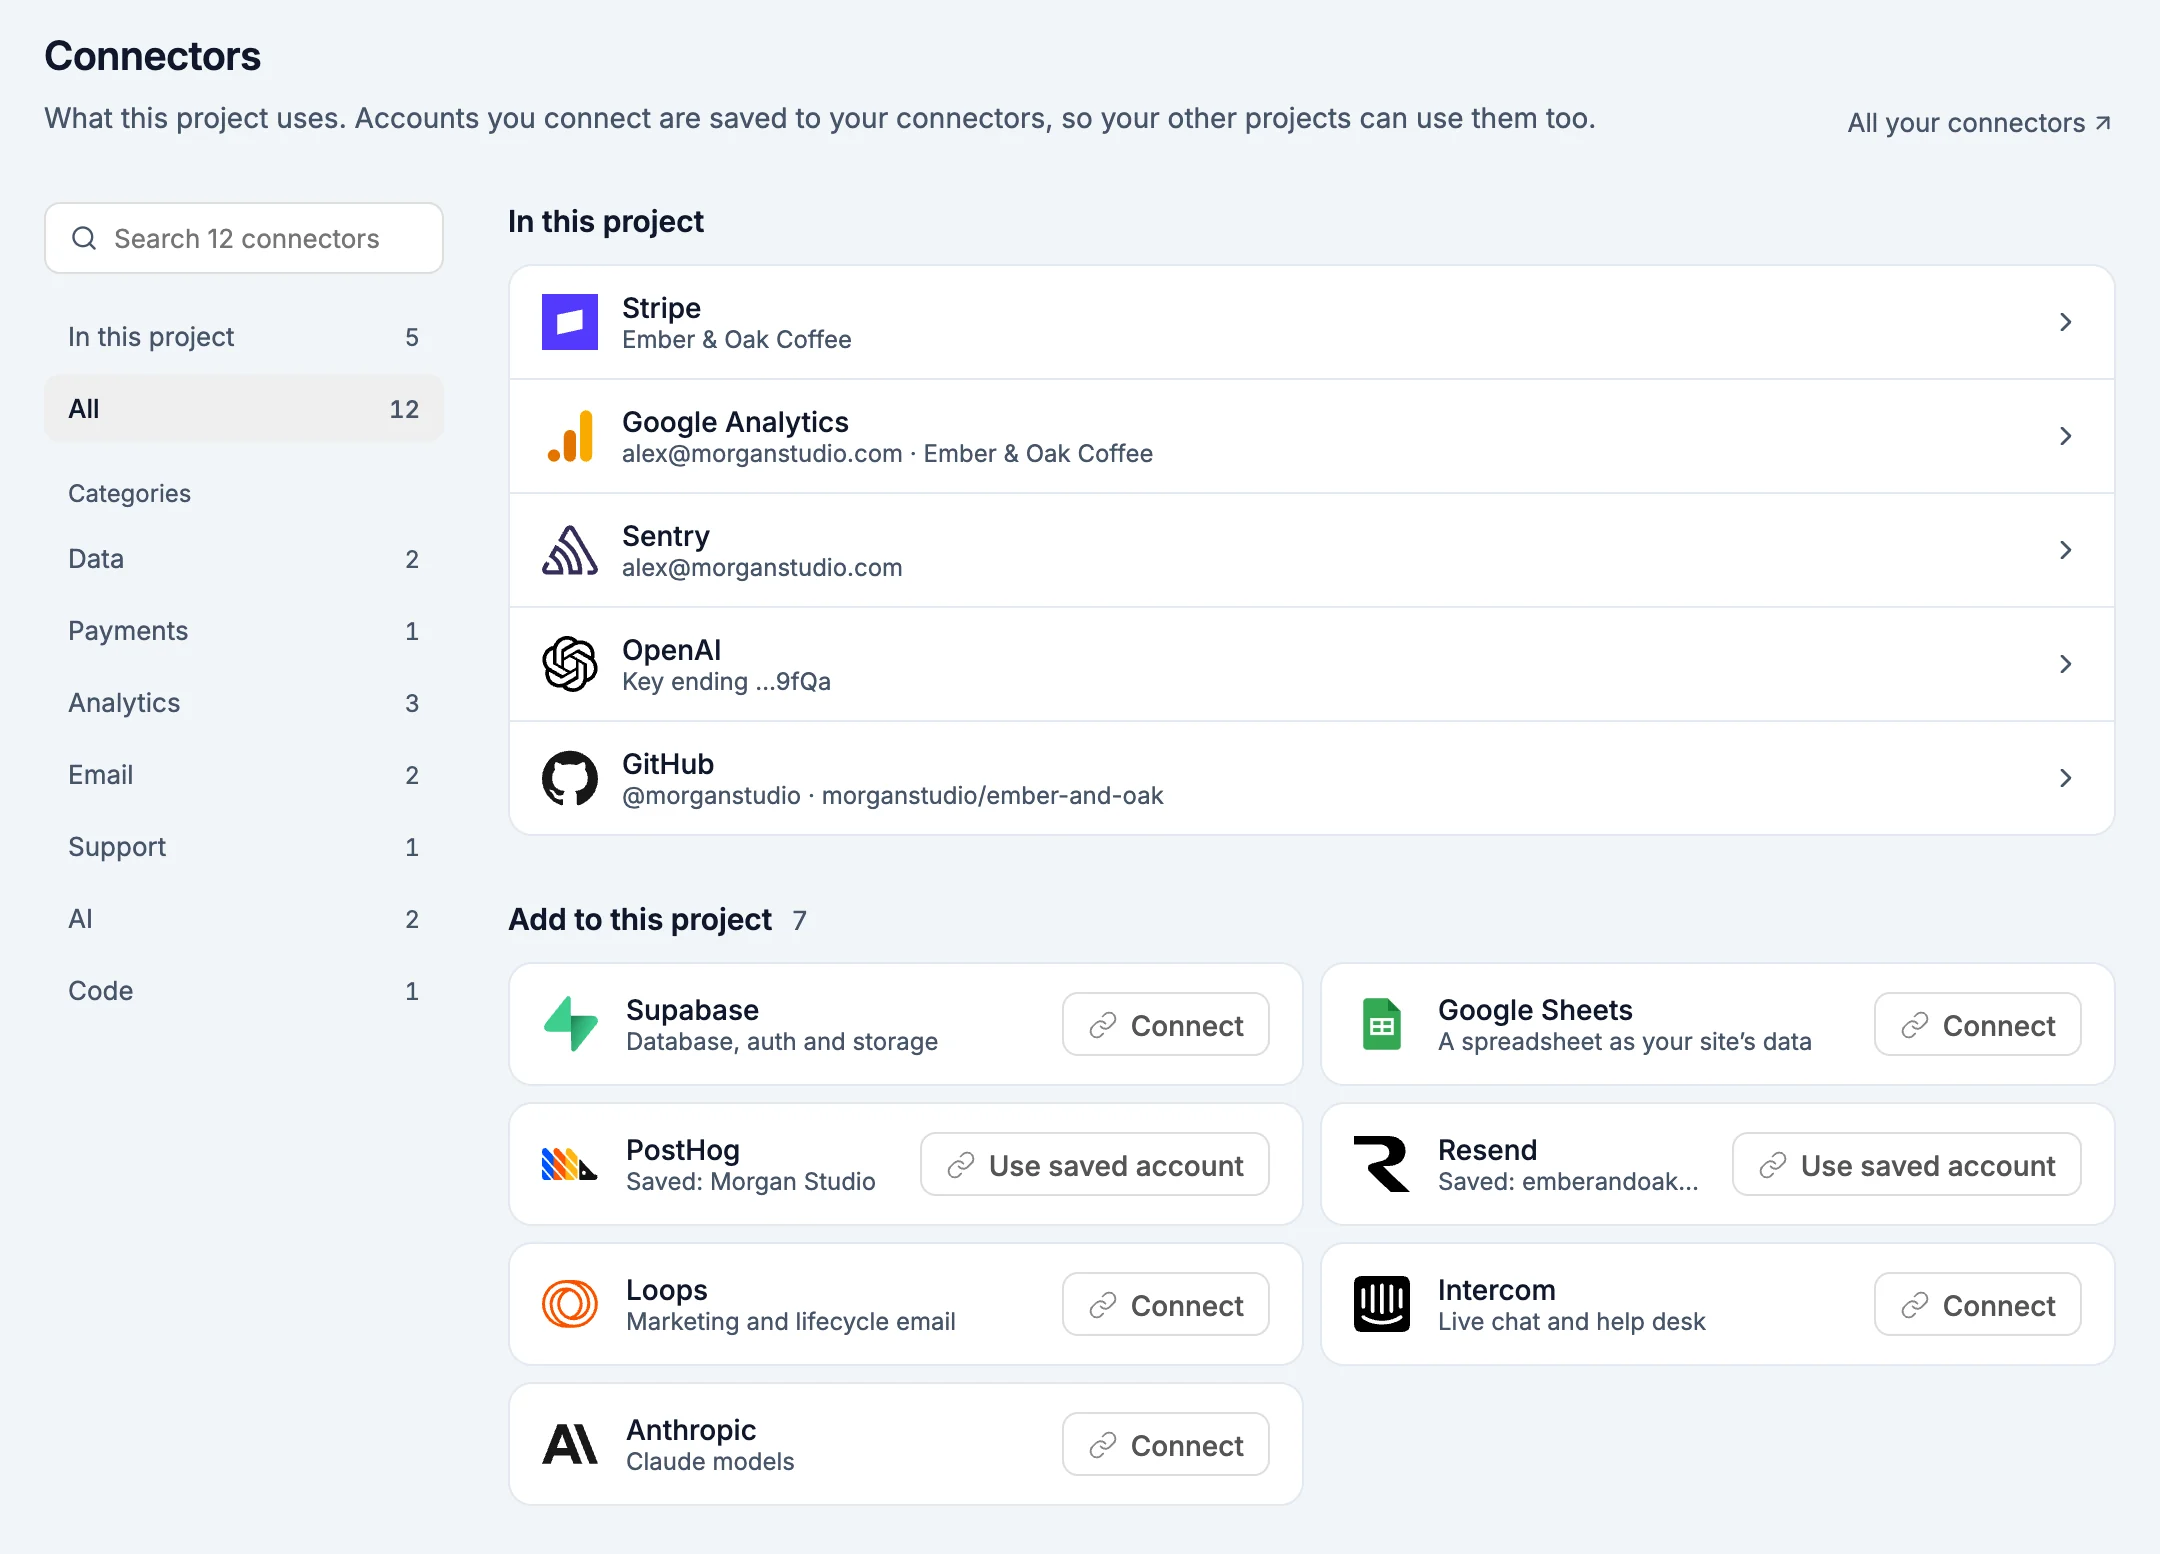
In the builder, open Settings and choose Connectors.
- In this project lists what the project uses. Click one to open it.
- Add to this project lists everything else. A service you already connected for another project shows Saved: and the account, and its button reads Use saved account (or Use saved key), so adding it takes one click.
- All your connectors opens the dashboard page.
Connect a service
Some services connect by signing in. Others take a key you paste.
| How | Connectors |
|---|---|
| Sign in | Stripe, GitHub, Sentry, PostHog, Google Analytics, Google Sheets, Supabase, Resend |
| Paste a key | OpenAI, Anthropic, Loops, Intercom (an App ID) |
Resend and Google Analytics offer both: Paste an API key for Resend, Paste a measurement ID for Google Analytics.
From a project:
- Open Settings > Connectors and click the service.
- Click Connect.
- Sign-in services open the service in a new window. Approve access there and you come back to the connector.
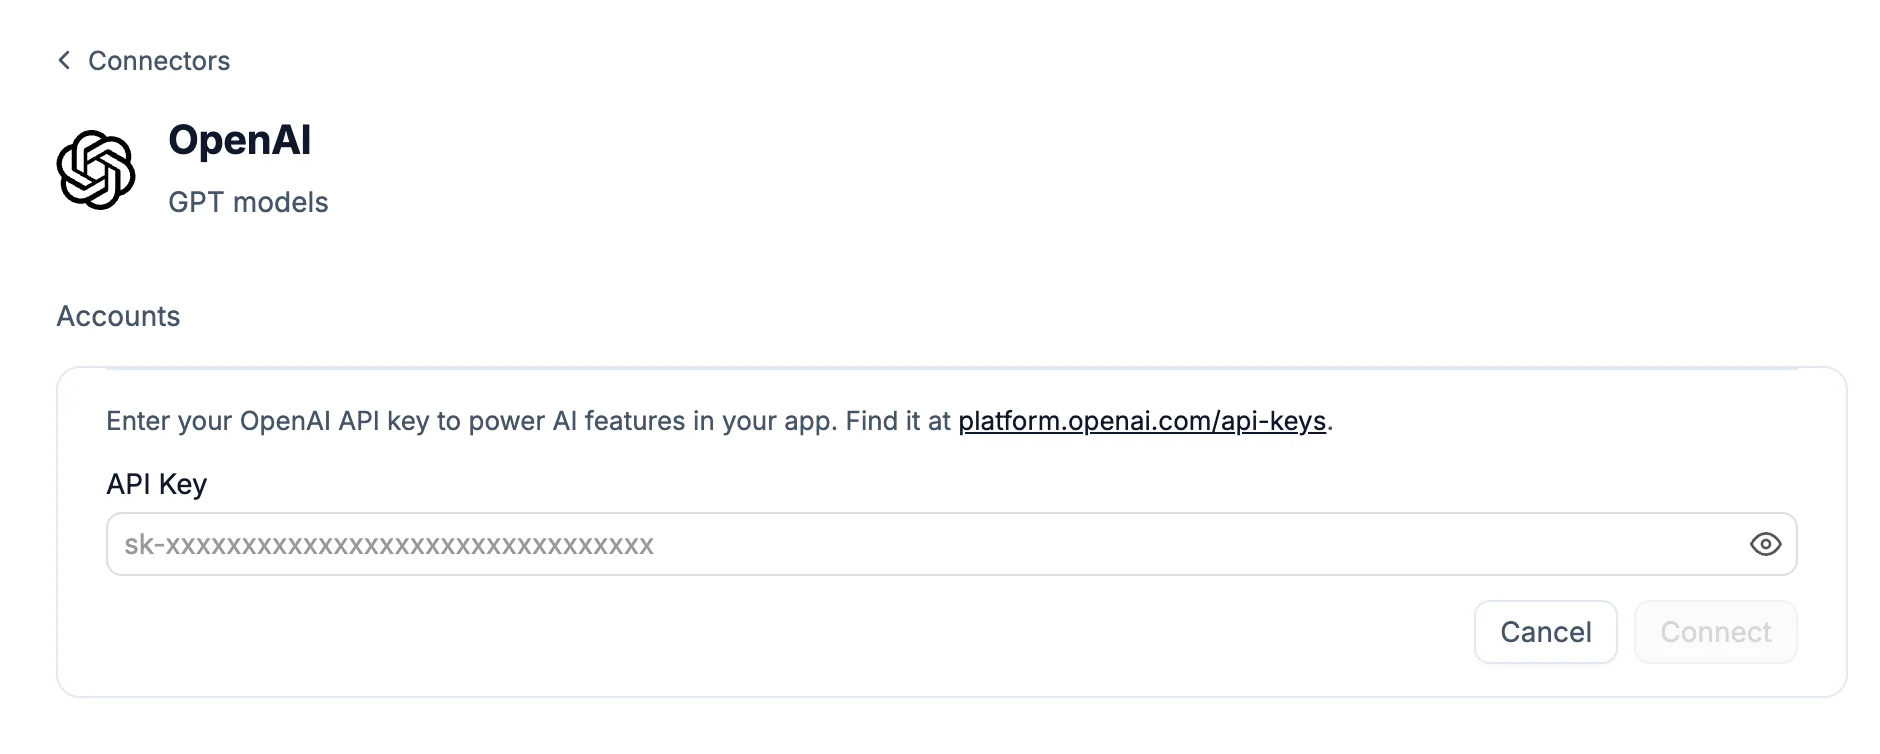
- Key services turn the Connect row into a form: where to find the key, a field for it, and Connect. Where the service allows it, WebTwizz checks the key first and shows Invalid API key if it's rejected.
- If there's something to pick, like a GitHub repository or a Sentry project, the connector opens on Finish connecting with the picker. Pick one and you're done.
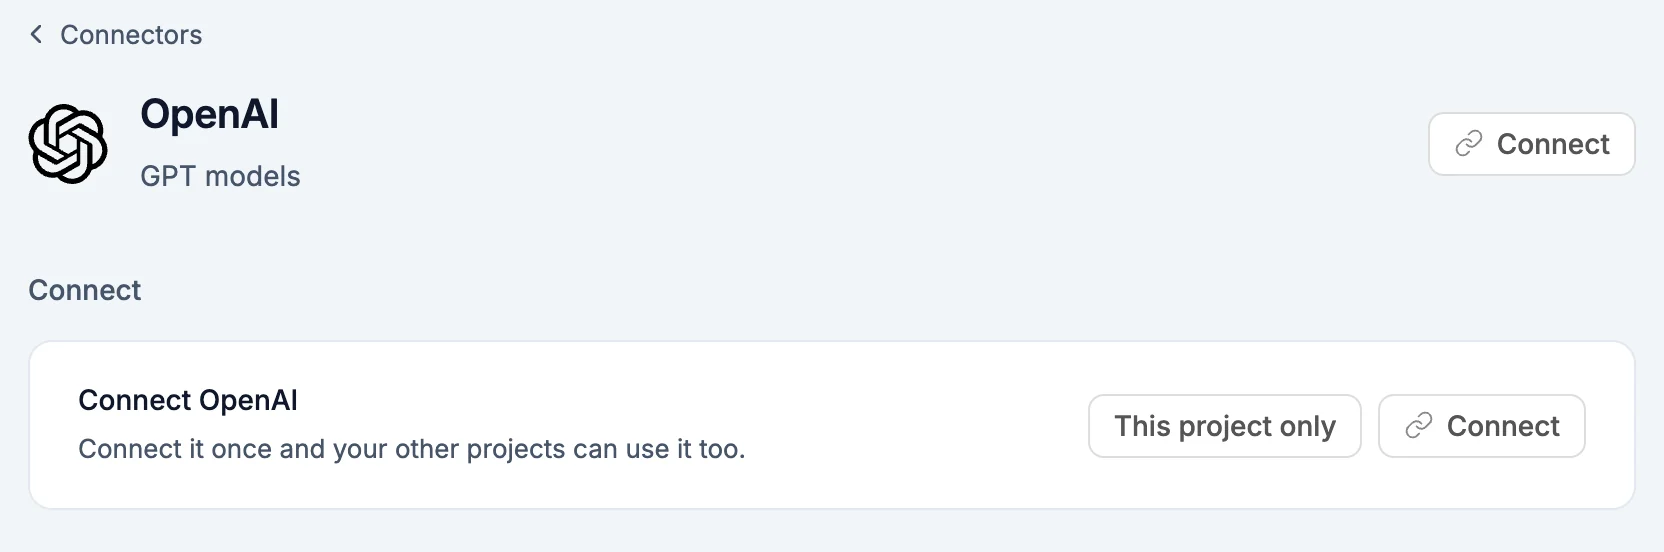
From the dashboard, click Connect on a service, or open its page and click Connect. The account is saved without being added to any project. Add it to a project later from that project's Settings > Connectors.
Supabase and Google Sheets are data sources, so their Connect opens the Data panel. A project has one data source at a time. See Data & CMS.
Keep an account to one project
This project only connects an account that only this project can use. Your other projects won't offer it. It's marked This project only in the project and One project only on the dashboard. Handy for a client's Stripe account or a key you don't want reused.
Inside a connector
Click a connector under In this project. From top to bottom:
- Overview: the service's data for this project, like revenue for Stripe, errors for Sentry or the latest commits for GitHub. Everything listed opens on the service, and tables and tabs open in the Data panel.
- Account: the account this project uses, when it was connected, and Also used in with your other projects that use it. Manage opens the account in your dashboard connectors. Key-based accounts also have Replace key.
- Settings: what this project picks, like the repository, the Sentry project or the AI model. Changes save as you make them. The On row (for example On Stripe) opens what this project uses on the service.
- Remove from this project: click Remove, then Remove from project? to confirm. Its keys come out of this project. Your other projects keep the account.
Each connector's page in these docs shows its overview and settings.
Switch or remove an account
- Switch accounts in a project: when you have more than one account for a service, the Account row has a button with the other account's name, like Use Morgan Studio. Its menu lists your other accounts and Connect another account. The project switches over and its keys are replaced.
- Rename an account: on the dashboard connector page, click the account's name, type, and press
Enter. - Replace a key: click Replace key on the account and paste the new one. Every project using that key switches to it.
- Remove an account everywhere: on the dashboard connector page, click Remove on the account, then Remove plus its name. It's disconnected from every project using it, and anything those sites do with it stops until you connect an account again.
Removing never deletes anything on the service. Your Stripe customers, GitHub repository and Sentry events stay where they are.
If a service stops accepting the saved sign-in, the account shows Needs reconnecting with a Reconnect button. If it needs a permission the account didn't give, the overview says the service needs one more permission, with Connect again.
Where the keys go
Every connector except GitHub adds its keys to Settings > Environment Variables, under From connected services. The service keeps them up to date, so they stay out of the editor. Your preview uses them right away. Publish again so your live site gets them too. See Environment variables.
Each connector's page lists the variables it adds.
Connectors in the chat
The AI knows which connectors the project uses and works with them for you.
Connect cards
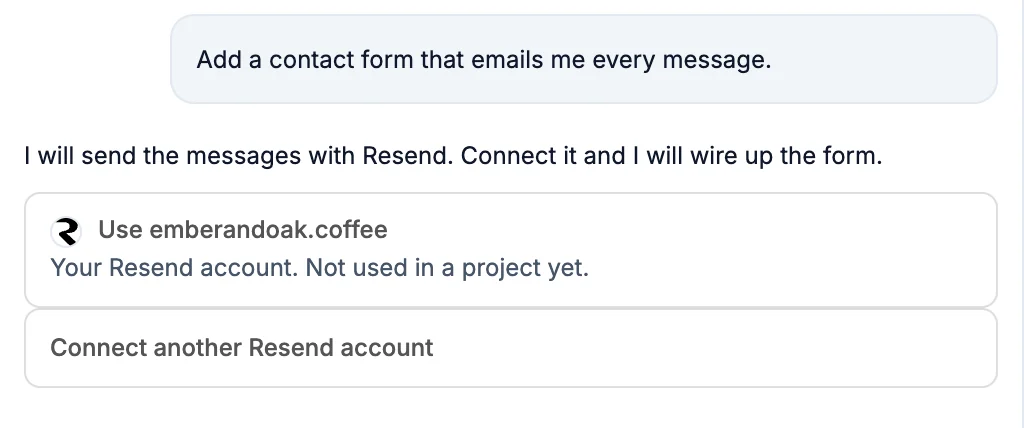
When you ask for something that needs a service, like a contact form that emails you, the AI adds a connect card for it, like Connect Resend. Click it to connect without leaving the chat. If you already have an account for that service, the card offers it by name, plus Connect another Resend account.
For a service that isn't a connector, the AI adds the keys it needs to Environment Variables without values, so you can paste them in under Needs a value.
Live cards
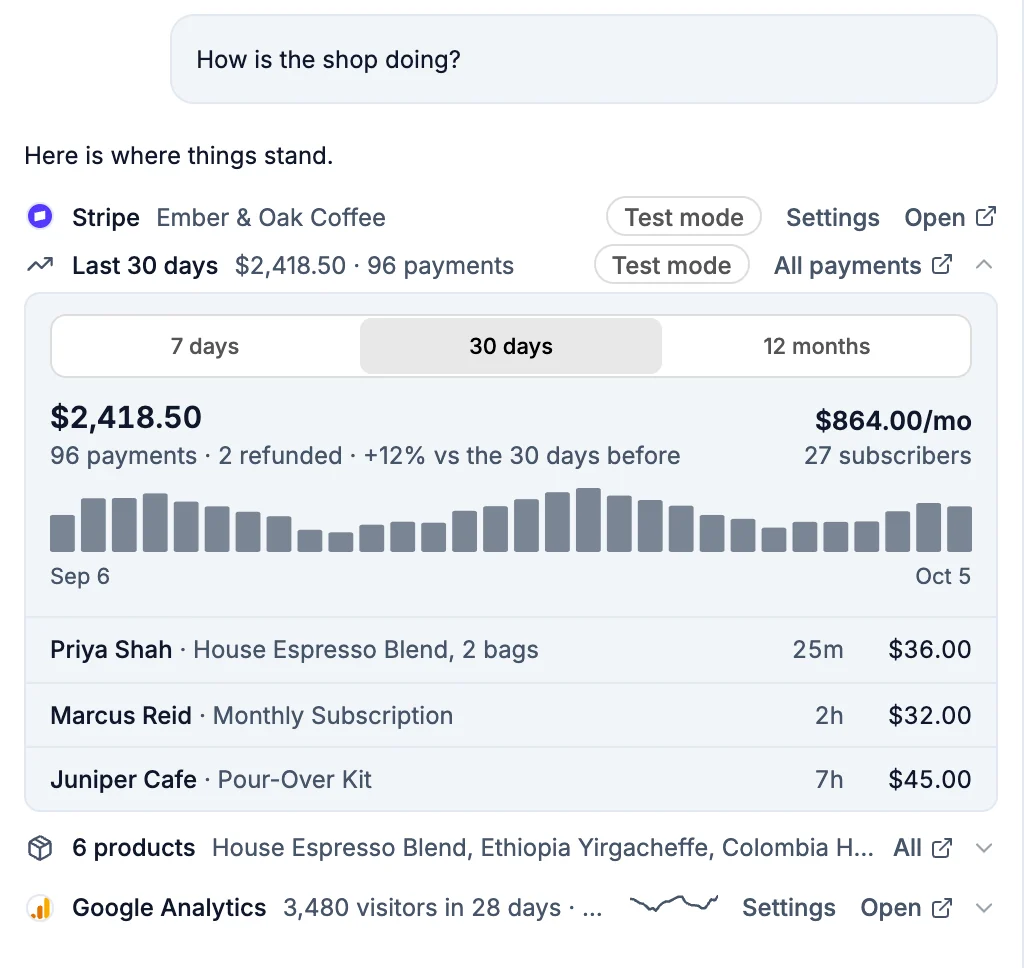
Ask how something is doing and the AI can answer with a service's live card: one row per service with the main number, Settings and Open, and details that expand. The numbers come straight from the service, so the AI never retypes or guesses them.
The AI reading a service
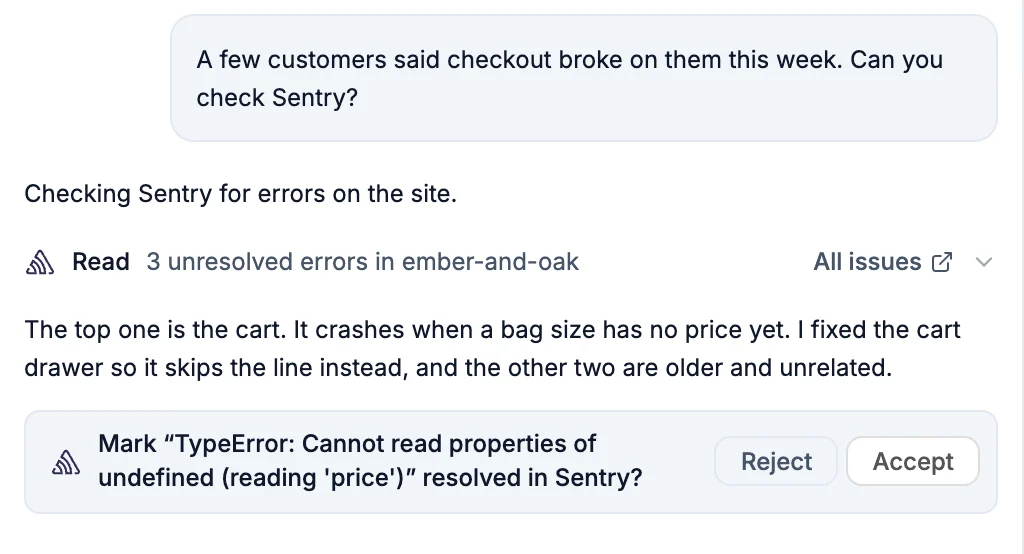
The AI reads your connected services when it helps: the errors in Sentry before it fixes one, last month's visitors from Google Analytics, whether your Resend domain is verified. Each read shows as a row in the chat. While it works, the service's logo pulses.

When it's done, the row says what it found. Click it to see the details.
It asks before changing things
Reads happen on their own. A change to your account on the service asks first, with Accept and Reject: marking a Sentry error resolved, or changing Supabase sign-in settings. Test emails from Resend and Loops only go to your own inbox, so they don't ask.
In Chat mode the AI can read connectors but can't change anything.
GitHub and Stripe have tools of their own: the AI works with your repository through git, and with your Stripe account through its Stripe tool. Your site's data goes through the Data panel's tools. Each connector page says what the AI can do with it.
All connectors
| Connector | What it's for | How you connect |
|---|---|---|
| Supabase | Database, auth and storage | Sign in, from the Data panel |
| Google Sheets | A spreadsheet as your site's data | Sign in with Google, from the Data panel |
| Stripe | Payments and subscriptions | Sign in |
| Google Analytics | Traffic for your published sites | Sign in with Google, or paste a measurement ID |
| PostHog | Product analytics and replays | Sign in |
| Sentry | Error monitoring | Sign in |
| Resend | Transactional email | Sign in, or paste an API key |
| Loops | Marketing and lifecycle email | Paste an API key |
| Intercom | Live chat and help desk | Paste an App ID |
| OpenAI | GPT models | Paste an API key |
| Anthropic | Claude models | Paste an API key |
| GitHub | Your code in your own repository | Sign in |